Deployment of myRivers
During the Software Product Engineering unit, we encountered the problem of having to manually start the server on one of our own computers as a localhost each time we wanted to use our Android app. This limited the number of smartphones using our app at the same time and forced us to change the IP address of the server whenever we used a different computer, slowing down the development process.
The solution was to use a dedicated server and migrate the database to it, ensuring that there is consistency among all developers.
The process of developing a web-app involves many steps and has many ramifications, especially if the app is customer-fronted. By gross simplification, the process can be divided in two main sections: development and deployment. These divisions are codependent, because the system architecture might impose some restrictions on how the app should be deployed. For instance, an app might require multiple interconnected servers, leading to a complex infrastructure and refactoring the code to make it scale. While development usually takes up more time and necessitates more thinking, deployment comes with a whole new set of challenges.
This technical article will explain the problem and the thought process of deploying a Node.js web-app with MongoDB on a DigitalOcean droplet, omitting some of the nitty-gritty details and concentrating on the most important aspects. At the same time, it is striving to be clear and provide useful advice for the more difficult stages of deployment.
DigitalOcean
DigitalOcean is a cloud computing service provider, allowing its users to rent servers, also known as droplets. Available with various specifications, the droplets simplify the procedure of deployment by offering pre-set server images for various scenarios. For example, there are one-click-images for Node.js, Django and Ruby on Rails, which configure the default settings of the server automatically to cater for particular applications. We have decided to manually install all the software we needed for our app, as this allowed for more customisation. DigitalOcean offers many server configurations, the cheapest one being $5/month + VAT. It boasts one CPU with 512 MB, a 20GB SSD disk and 1TB of memory. We decided to use this option because our app is not particularly resource-consuming. We also chose Ubuntu 16.04 as our operating system and opted in for a $1/month backup option, which has already been proven useful when we needed to roll-back. Since the users of the app will be volunteers from UK’s Rivers Trust, the server is hosted in London, reducing the latency of data transfers.
Interacting with the server through SSH
Interaction with the server will be made over a Secure SHell (SSH), therefore creating a public key is
a recommended security measure that can be done directly from their website. This key is then saved as a
.pub file on your computer. To connect to the server, open a terminal, specify the user and the ip address
of the server, and use the -i option followed by the path to the .pub file.
ssh root@ip-address -i path/to/key.pub
MongoDB
The next step involves installing MongoDB on the server. MongoDB runs as a separate service. When we were analyzing different database solutions, we had to choose between using a Database-as-a-Service provider like MongoLab, or installing it on our server. In the early stages of development, it was easier to use a centralized database server on MongoLab, because changes made to the database from one developer rendered it inconsistent for the others. Later on, we migrated our database server to the DigitalOcean droplet.
A detailed guide offered by DigitalOcean on how to install MongoDB on a server running Ubuntu 16.04 can be found at this address.
After installing the packet using apt-get, we need to set up a service such that the MongoDB launches every time the server boots. To do this, create a file called mongodb.service at the following path and include the following code.
sudo nano /etc/systemd/system/mongodb.service
[Unit]
Description=High-performance, schema-free document-oriented database
After=network.target

[Service]
User=mongodb
ExecStart=/usr/bin/mongod --quiet --config /etc/mongod.conf

[Install]
WantedBy=multi-user.target
Finally, start the database server and check its status to see if there are any problems.
sudo systemctl start mongodb
sudo systemctl status mongodb
After installing and setting up mongodb as a service, we can migrate the databases and collections our app needs to our new server. Our app did not require any data transfers because all the photos and data uploaded through the app was only for testing purposes. As such, we manually recreated the database and collections. If you need to migrate your database, the official MongoDB website provides helpful tips and tricks on doing that:
Process manager pm2
The code for our app is stored on a github repository. In order to access it, the repository needs to be cloned to the server. Figure 1 shows the structure of our Node.js app directory.
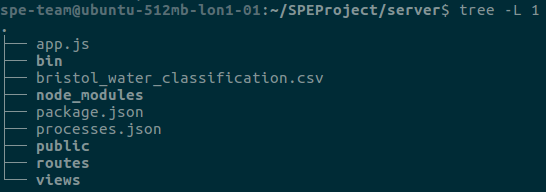 |
|---|
| Figure 1: Node.js app directory structure |
Dependencies found in the package.json file need to be installed using npm install. Afterwards,
to start the Node.js server, the simplest method is to use npm start. This has the compelling
disadvantage of having to maintain a connection between the computer used to ssh and the server.
The drawback can be removed by using a process manager, e.g. pm2, Forever, StrongLoop Process Manager.
The process manager (i.e. pm2 in our case) works as a service which keeps the application alive forever,
restarting it in case of failure and providing additional functionality with regards to error logging and
monitoring. It also has a built-in load balancer, which could be useful in the future, when multiple
servers might be running concurrently.
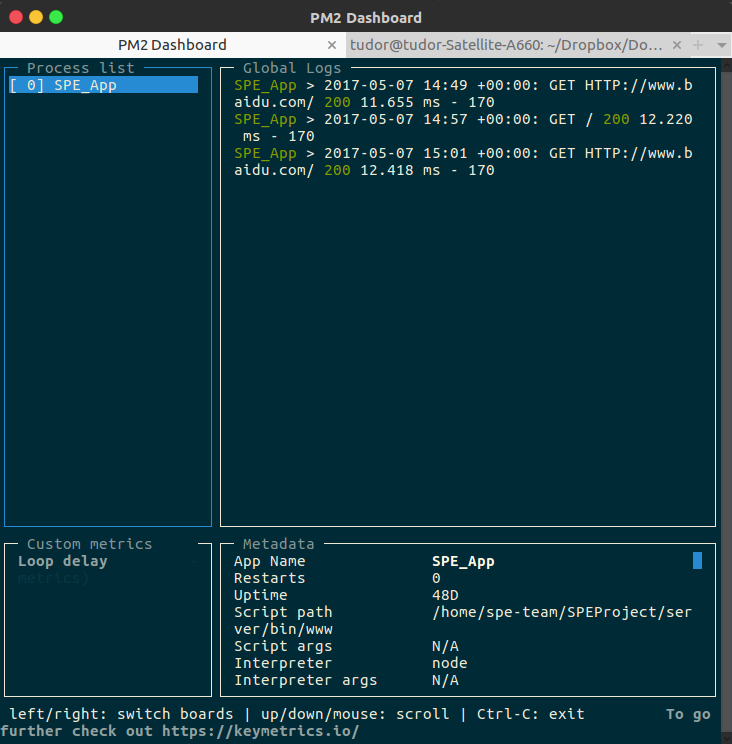 |
|---|
| Figure 2: pm2 monitoring |
In order to start the process manager, use pm2 start processes.json, which contains information about
the app you want to launch.
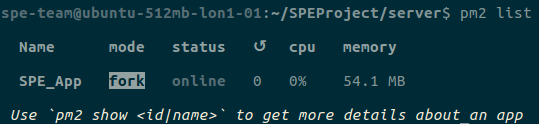 |
|---|
| Figure 3: List of active pm2 processes |
The watch key points to the folders pm2 should look after. It restarts the app whenever it detects
changes in those folders. Watching the entire app directory might not be what we want. When we first
ran the process manager, the app would restart every time we uploaded an image, because uploading images
entailed saving them for some preprocessing (e.g. generating thumbnails), and only afterwards saving
them in the database. To fix this, an ignore_watch field containing the paths to the ignored directories
needs to be added.
   {
      "apps" : [{
        "name"        : "SPE_App",
        "script"      : "bin/www",
        "watch"       : "../",
        "ignore_watch" : ["routes/uploads", "routes/thumbnails", "node_modules"],
        "log_date_format"  : "YYYY-MM-DD HH:mm Z",
      }]
    }
Now, new versions of the app can be applied rapidly by pulling the code from github, as pm2 constantly detects changes in the code in the relevant files.
Limitations and alternatives
To enhance the process of deployment even further, continuous integration would need to be implemented. Continuous integration ensures that updates to the software are instantly made available on the production servers and is particularly useful when multiple developers work on the codebase at the same time. Merging too rarely might lead to “integration hell”. Use of continuous integration promotes frequent merging, reducing the cost and time of development.
An additional reason we started using DigitalOcean, as opposed to the server provided by the university was that the one offered by the university was running an old, unsupported version of RedHat. This prevented us from installing Node.js. Therefore, we began looking for alternatives. The github student pack comes with $50 worth of credit for new accounts. This, in conjunction with the fact that we have successfully used their services in the past, prompted us to deploy our solution on their servers. An alternative to DigitalOcean would be Linode, because it offers a more powerful server for the same monthly price.
Conclusion
In conclusion, this technical article has explored the deployment of a Node.js app, as well as the problems that arise in the process. We looked at cloud infrastructure providers, which database to use, how to start the Node.js app and keep it alive in case it crashes. Finally, we discussed the limitations and the alternatives of our decisions and solutions.